For a bungeecord network you need at least 3 servers; bungeecord server, lobby server, and a server of your choice (survival, towny, factions, minigame, etc.). 1 GB server for Bungeecord works perfectly fine.
For this tutorial, we’re going to be setting up a lobby server as the fallback/main server where people can connect to the survival server from.


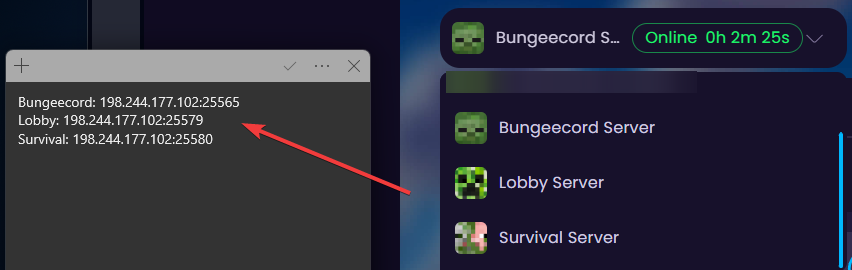
Make sure to collect each server's IPs and ports so it's easier to connect them all together. You can use the built-in Notes app on your device for this.
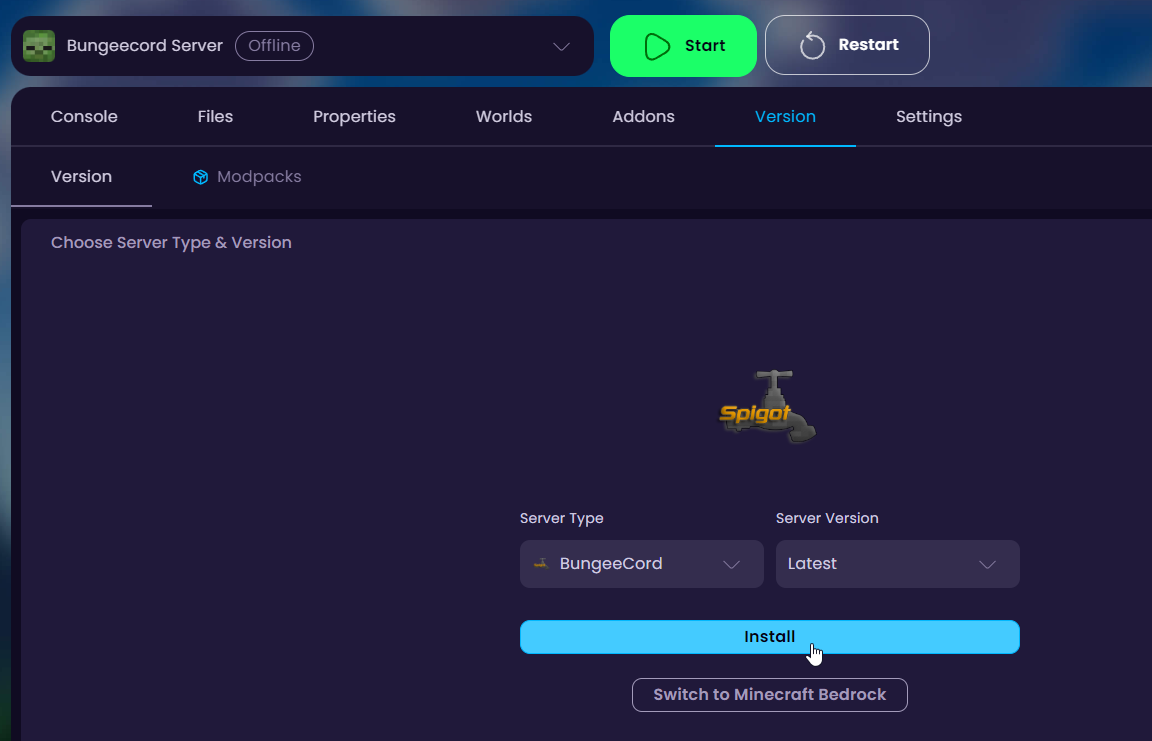
Also make sure that the Bungeecord Server is running the Bungeecord Version on the server.
After all the IPs are properly saved, navigate to your Bungeecord Server and close it. Once closed, navigate to the Files → /config.yml file.

In this file, scroll to the ‘servers:’ where all the servers will be configured into. Create as many servers in here as you have (bungeecord server WILL NOT be listed here).
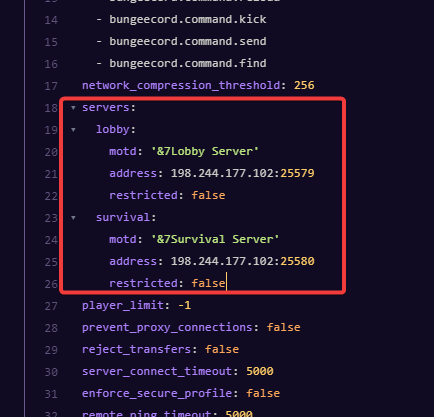
Click on Save Content to save the changes.
Navigate to the Lobby server and if the server hasn't been started before, start it to generate all the files. After it has successfully started, close the server.
Navigate to the Properties tab and turn off online-mode.

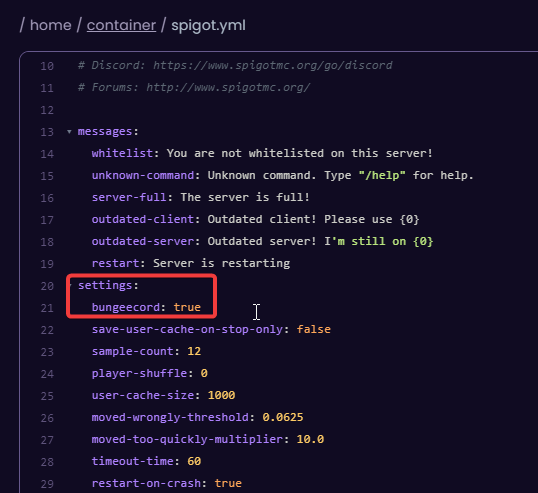
After turned off, navigate to the Files → /spigot.yml file and change the ‘bungeecord: false’ option to true.
This has to be done on all the other servers as well (in this tutorial; survival as well). After all the other servers have online-mode set to false and bungeecord to true, you can start all the servers and join the server through the Bungeecord Server's IP.
To navigate between the lobby and survival servers, you can join the server and run the command ‘/server lobby’ or ‘/server survival’. If you do not have access, make sure you have OP permissions.
How to OP Yourself on Your Minecraft Server
This article shows you step-by-step on how to OP yourself in your server.
 Congratulations, you've successfully set up a bungeecord network. If you have any issues or concerns, please contact us through the ticket system.

