Head over to the Game Panel and stop your server.
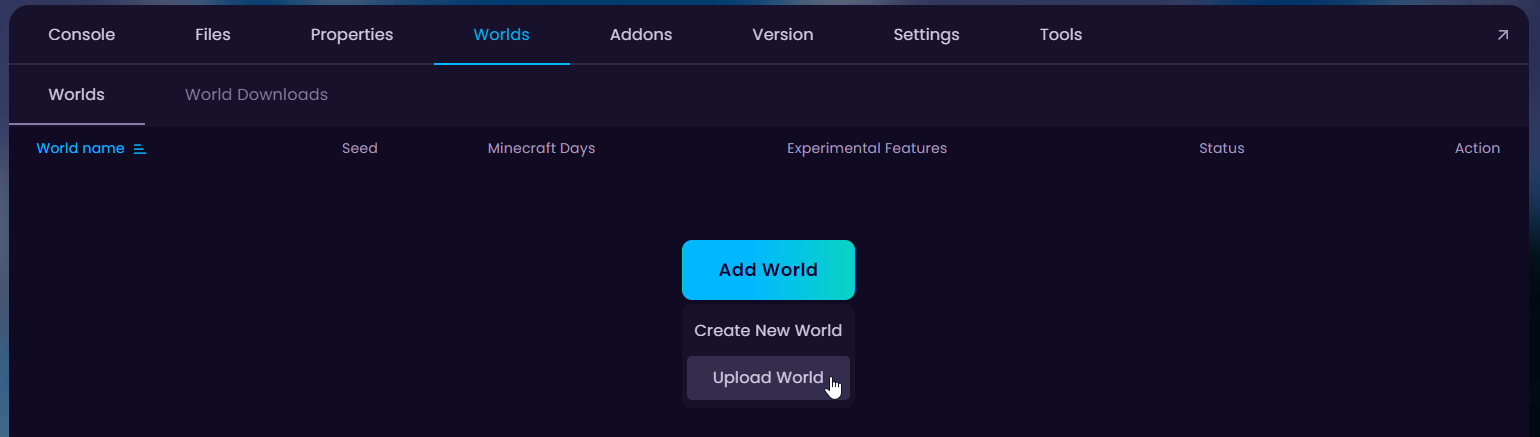
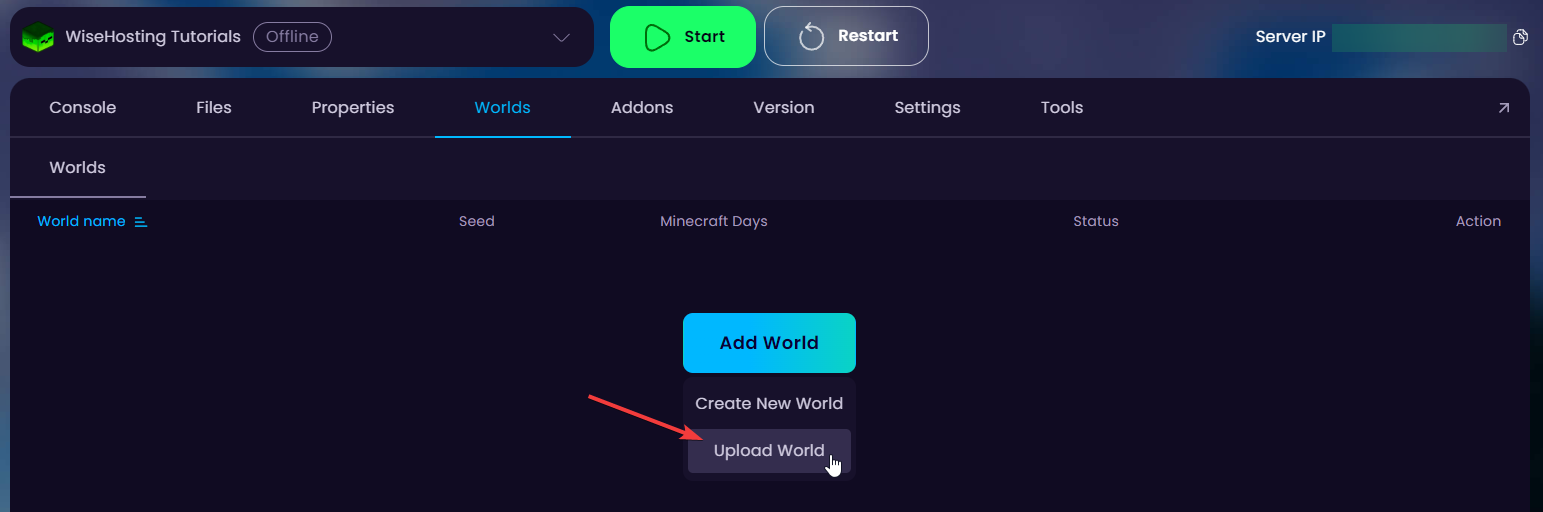
Navigate to the Worlds tab and click on the Add World → Upload World button.
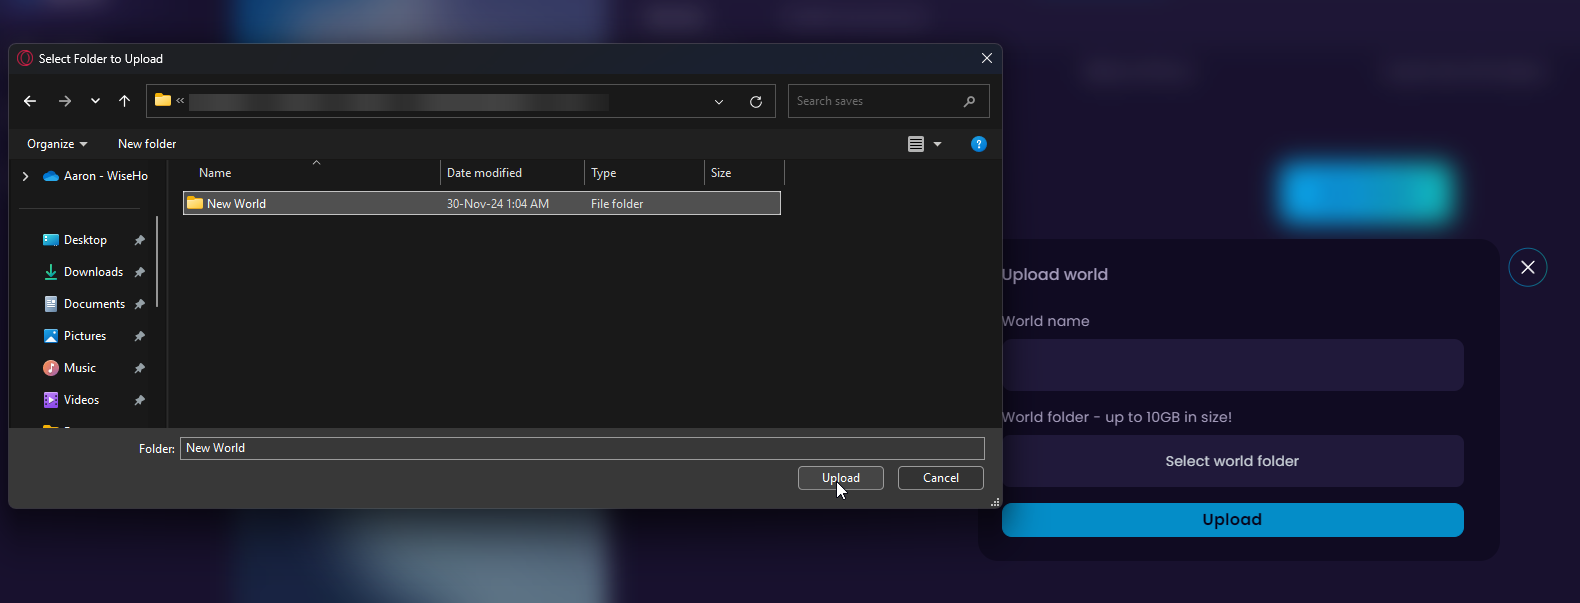
Select your world (it must be a regular folder, cannot be zipped) and name your world. After that, simply click on the Upload button.
Make sure that you activate the new world from the Worlds tab and start your server.

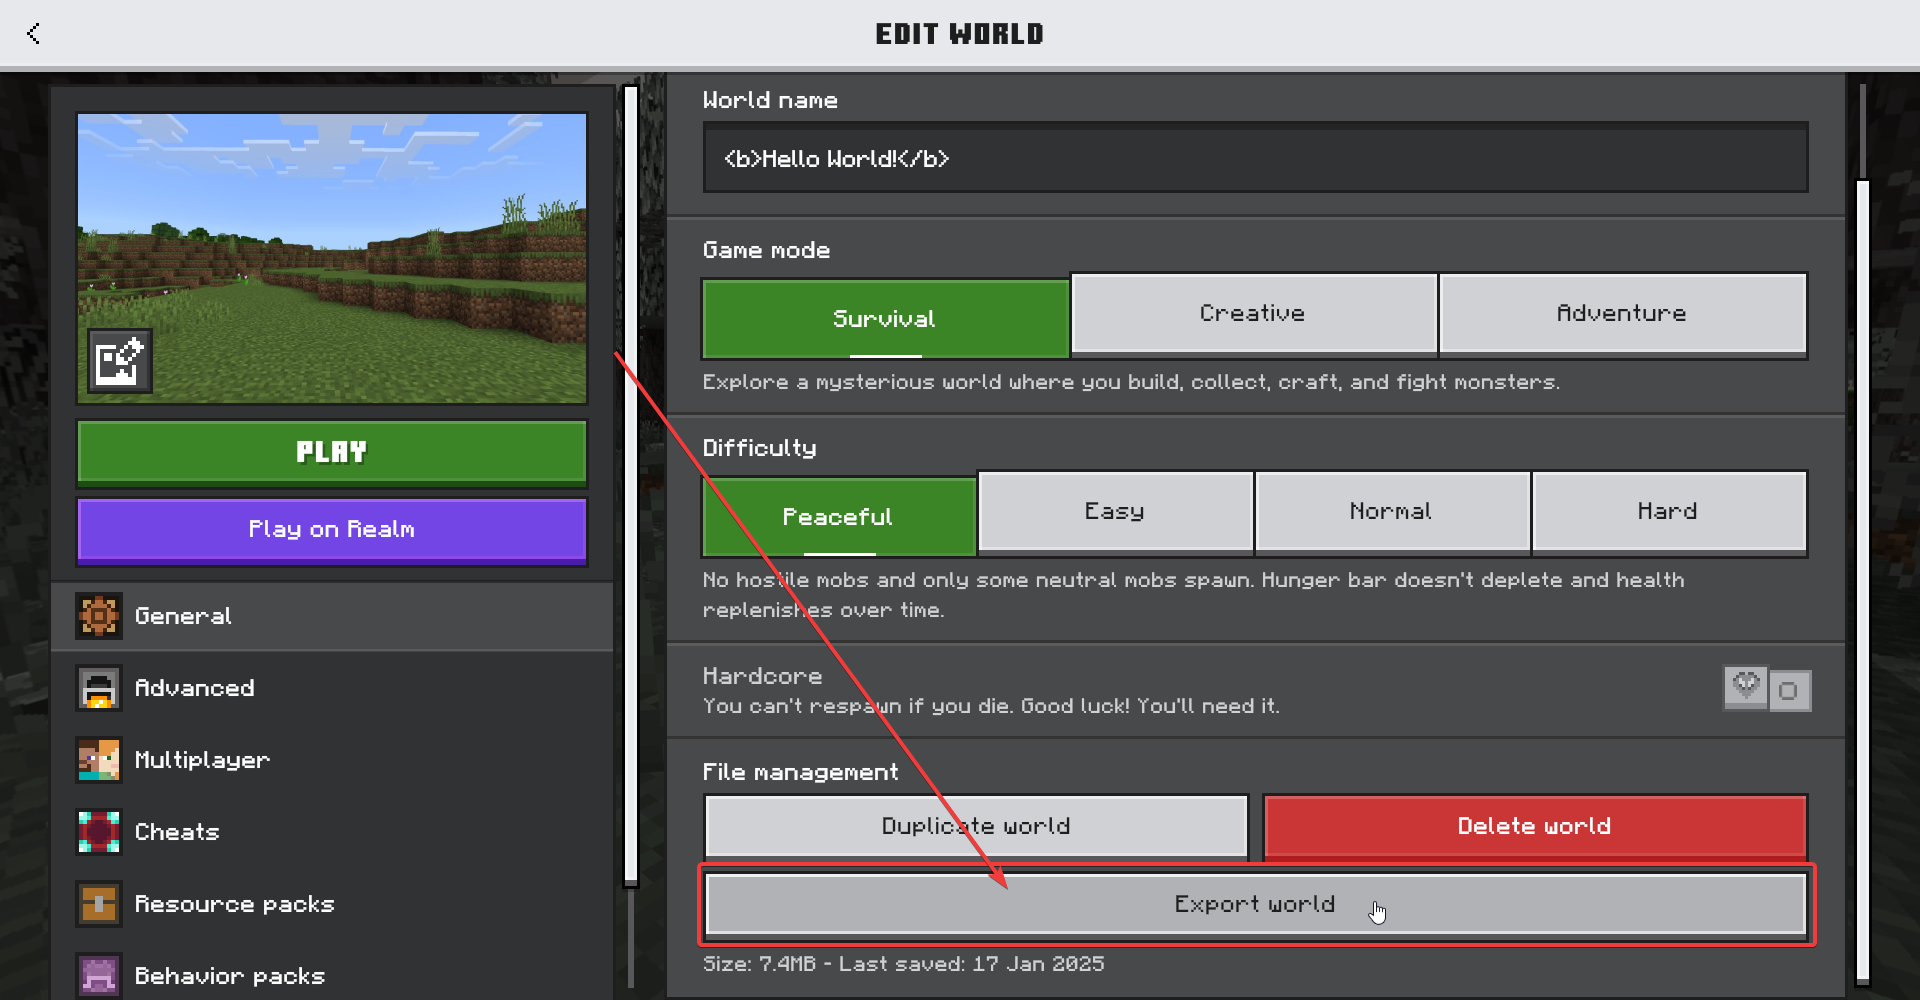
For this you need to have a .mcworld file of your world. To export your singleplayer world, simply launch your game and export the world by clicking the pencil icon next to the world you wish to export and click on the Export World button.
After that, follow these steps:
Head over to the Game Panel and close your server.
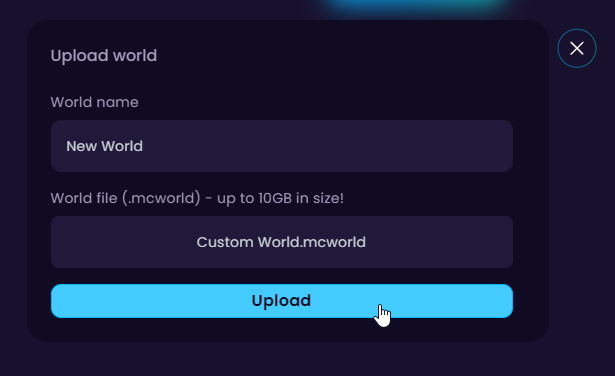
Navigate to the Worlds tab and click on the Add World → Upload World button.
3. Select the .mcworld file you just exported and name your world. After that, click on the Upload button.
Once upload is complete, make sure you activate the world through the Worlds tab and start your server.
 Congratulations, you've successfully uploaded your own world to your Minecraft server. If you have any issues or concerns, please contact us through the ticket system.

