Allocating RAM to your Minecraft instance can significantly improve the gameplay experience, giving you a smoother and lag-free experience. In this guide, we will be covering how to allocate more RAM to your default Minecraft launcher, Modrinth App, and CurseForge App.

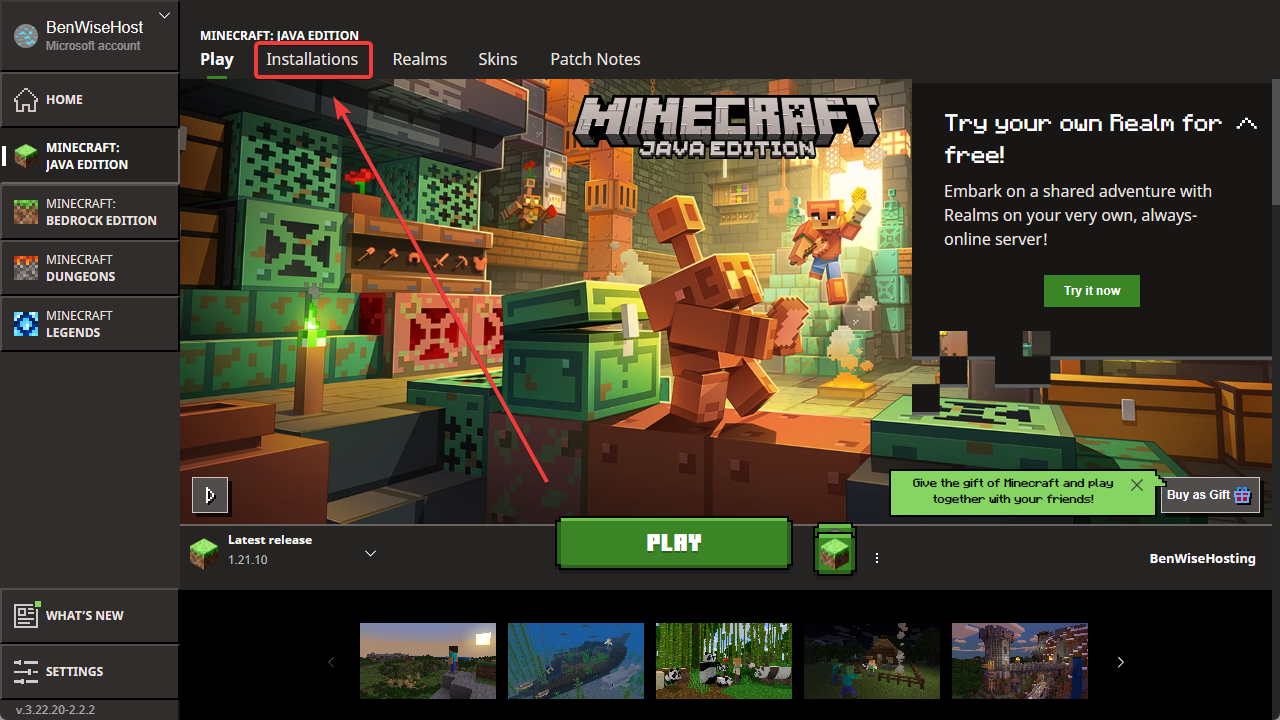
Open your Minecraft launcher and go to the Installations tab.
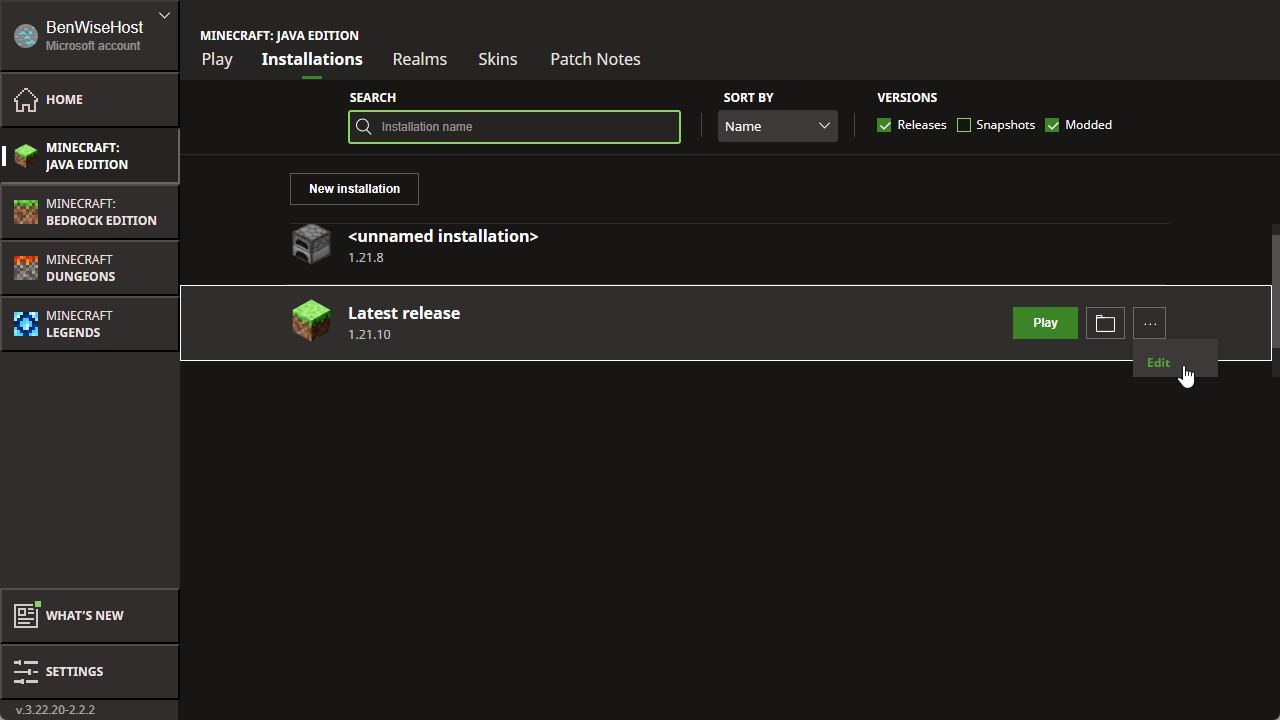
Click the three dots and edit next to the installation you want to allocate more RAM to.
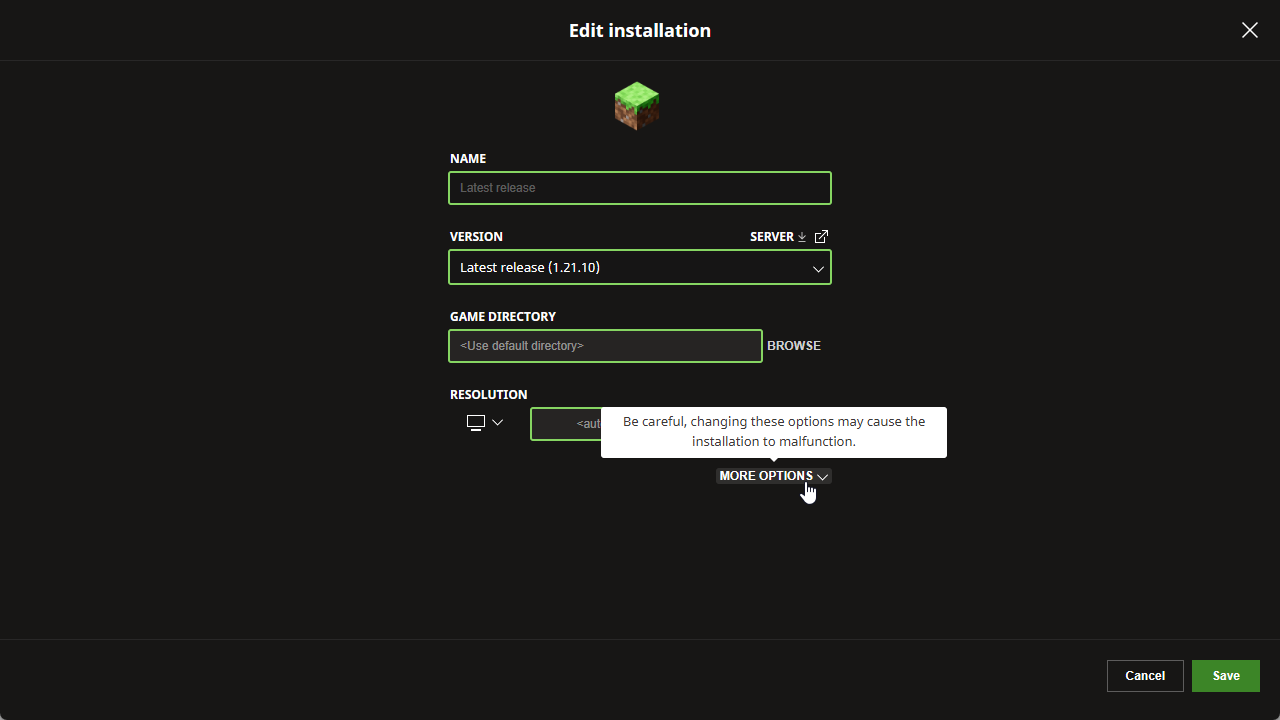
Click on MORE OPTIONS.
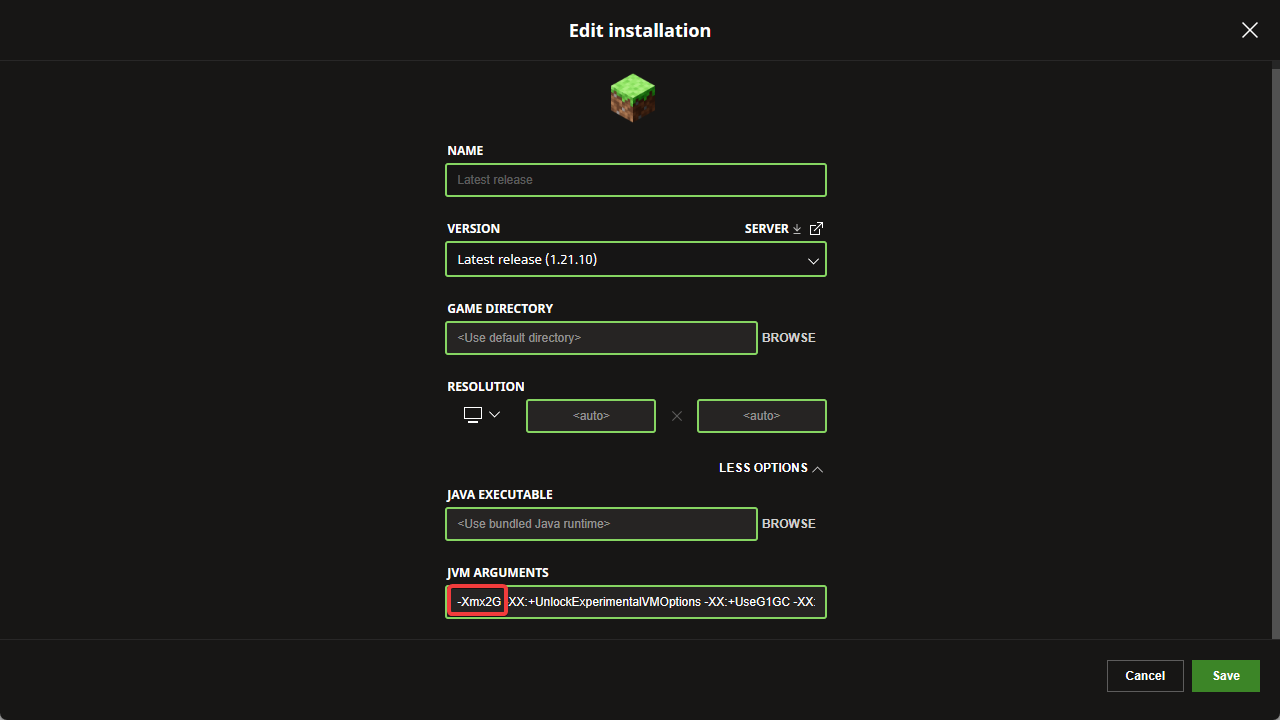
From here, change the -Xmx2G flag number to whatever number you want to allocate to that installation. For reference, 2 is 2 GB of RAM.
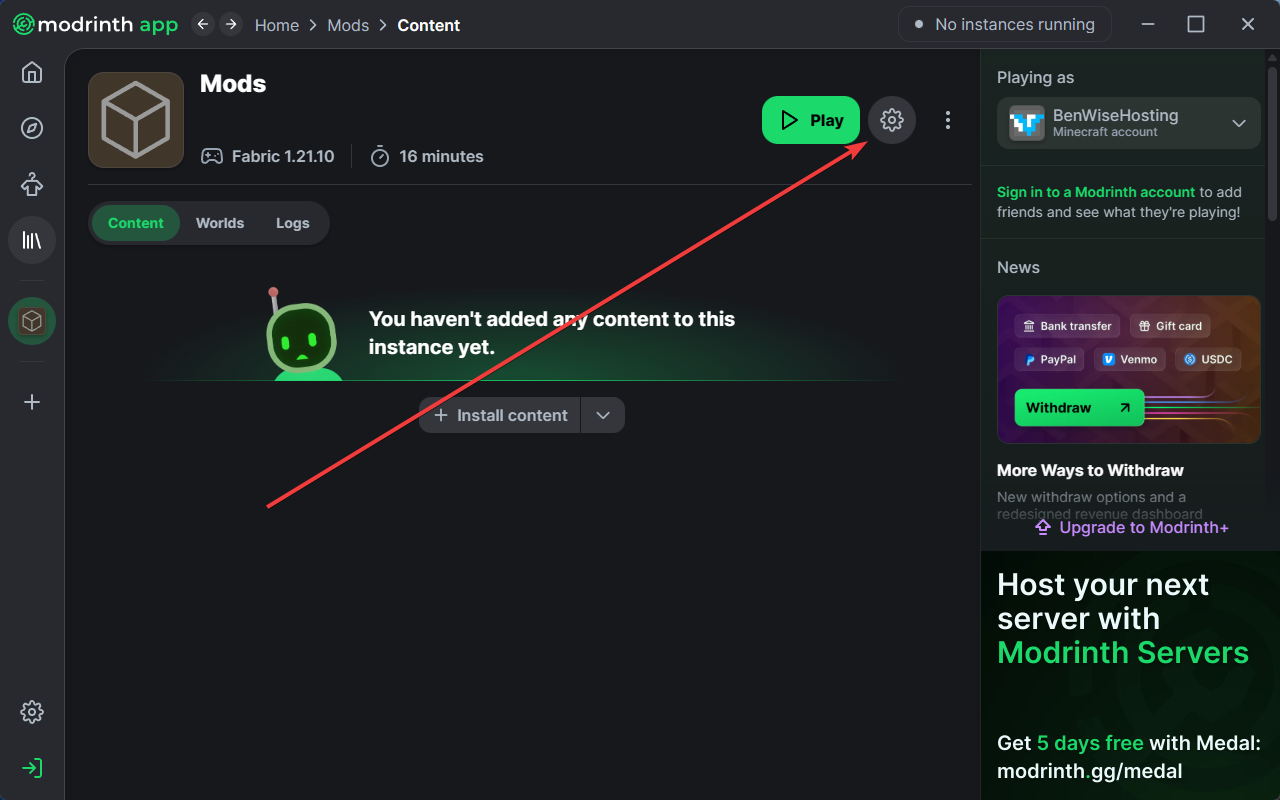
Open up the Modrinth app and go to your instance’s settings.
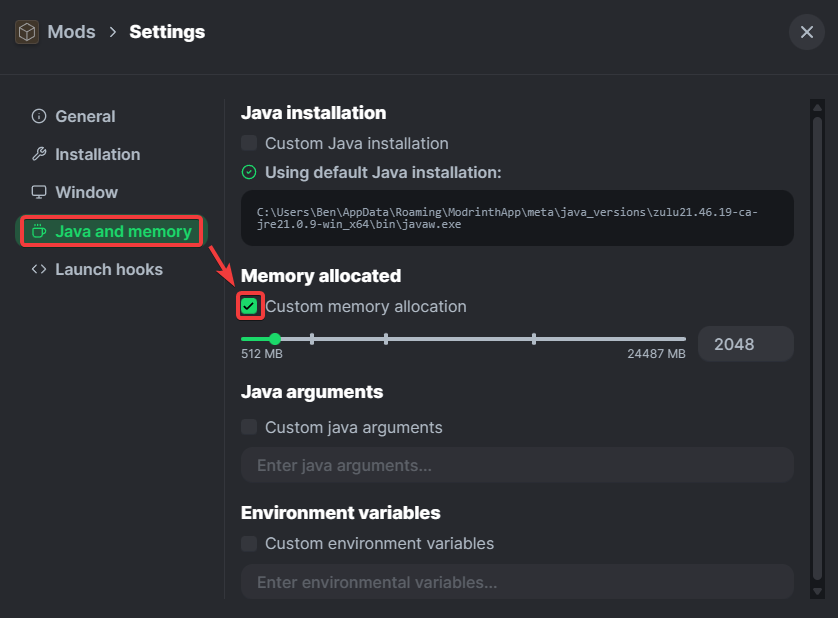
Go to the Java and memory tab, and check the Custom memory allocation box. From here, you can slide the slider to allocate as much memory as you have.
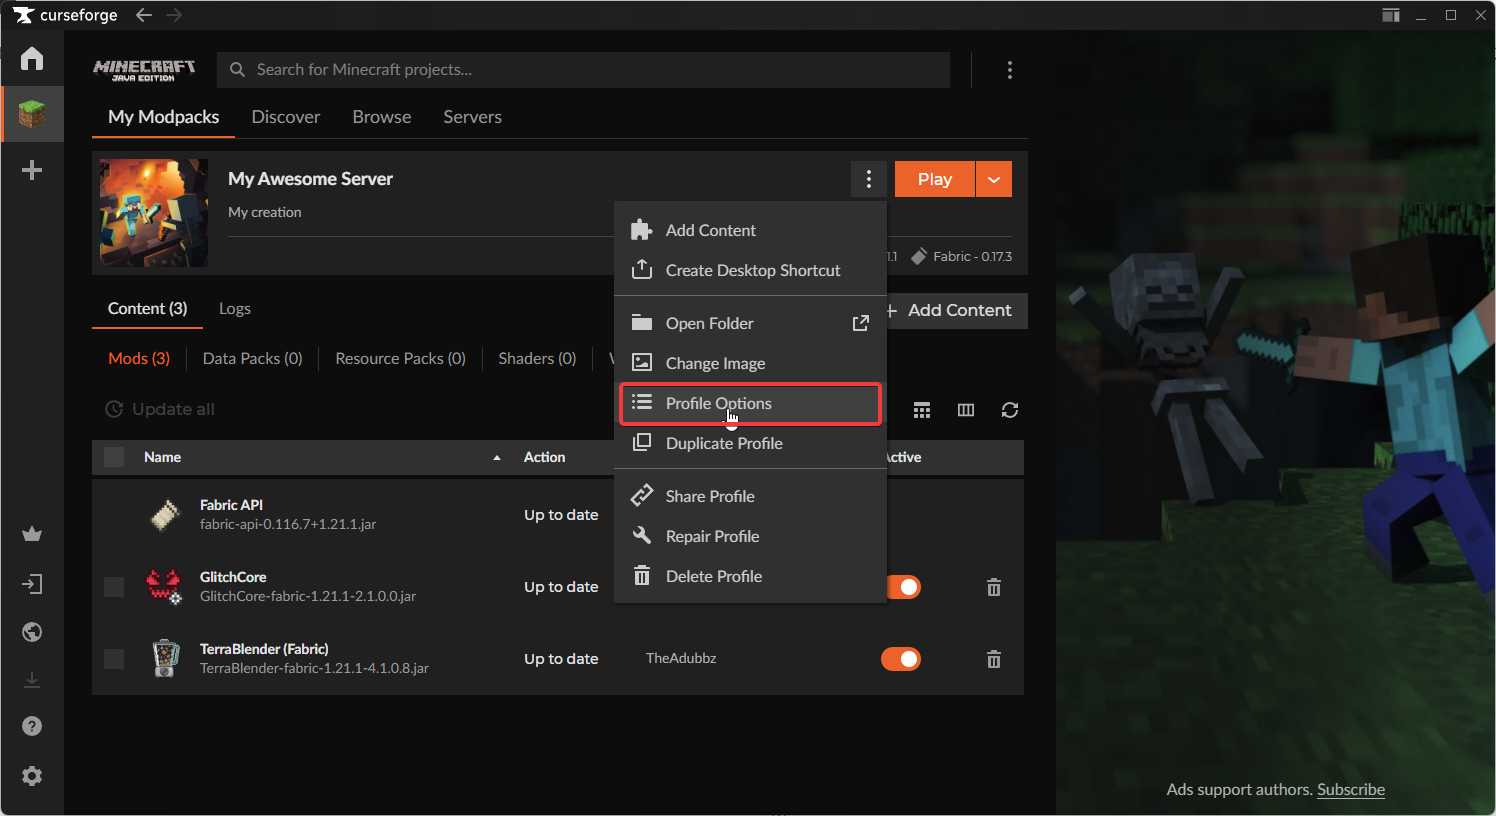
Open the CurseForge App, and go to your instance’s Profile Options under the three dots.
From here check the Custom RAM Allocation option. After that, slide the slider to how much RAM you want to allocate to the instance.
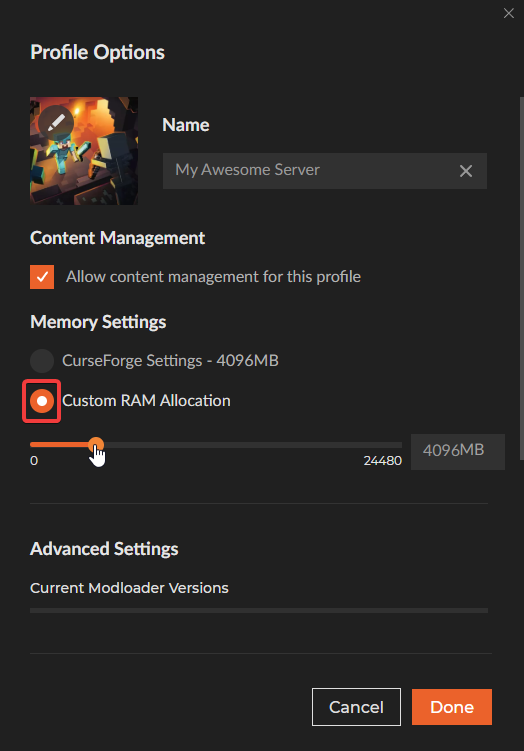
After you have allocated the desired amount of RAM, click Done.
 Congratulations, you've now successfully learned how to allocate more RAM to your game! If you have any issues or concerns, please contact us through the ticket system.