Head over to the Game Panel and stop your server.
Navigate to the “Addons → Presets” tab and install the “Dynmap” preset. This will automatically install the compatible version of Dynmap and configure it for you.
This action will also provide you with a live map link. Save this for later use.


Start the server and join it. Make sure you have OP permissions and run the “/dynmap fullrender” command to render the world.
Once the render is complete, visit the live map through the link that you obtained previously (http://yourserverip:dynmap_port).
Head over to the Game Panel and stop your server.
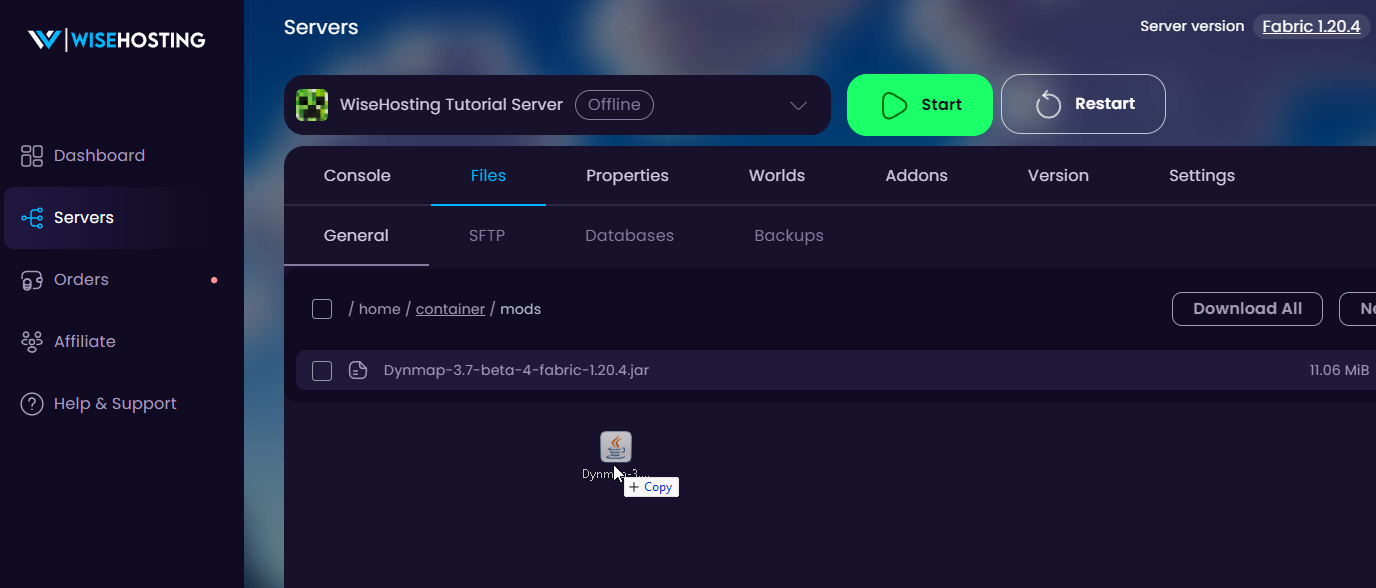
Navigate to the Files tab and depending on your server version, open the plugins/mods folder and upload the plugin/mod there.
If you're using Forge/Fabric, you'll upload it to the mods folder. If you're using Paper/Spigot, you'll upload it to the plugins folder.

Start your server for it to generate the Dynmap's Configuration file. Once the server fully started, you can close the server.
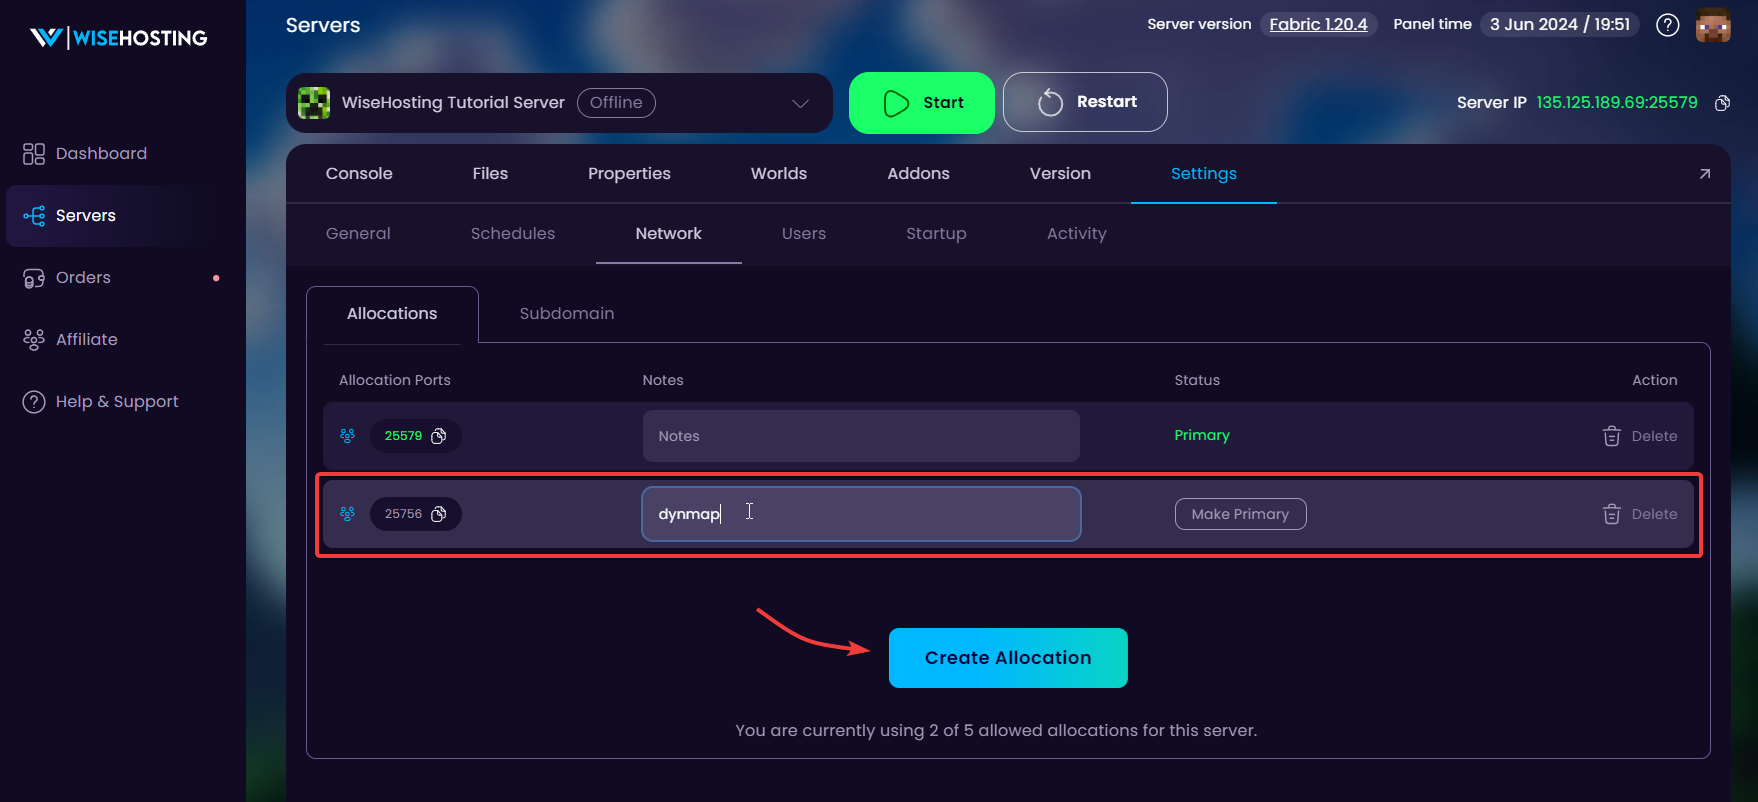
Navigate to the Settings -> Network tab and click on Create Allocation to generate a new port for Dynmap. We will use this port for the configuration file.

PLUGINS: If you installed the plugin version of DynMap, open up the plugins folder and dynmap folder in it.
MODS: If you installed the mod version of DynMap, open up the dynmap folder in the main directory or in the config folder.
You can now find the file configuration.txt from the folder. Open it up and scroll to about 2/3 of the file where you can find an option webserver-port: 8123. Change this to the port we generated previously.
Click on Save Content on the bottom right, start the server and join it. Make sure you have OP permissions and run the /dynmap fullrender command to render the world.
Once the render is complete, you can access the live map by visiting the site http://yourserverip:dynmap_port.
 Congratulations, you've successfully installed Dynmap on your server. If you have any issues or concerns, please contact us through the ticket system.